entree

Ten Minute Mediterranean Tuna Melt

Tuna melt with grapes.jpg

Hello!

I posted this tuna melt on my stories a while back and had some of you wanting me to share the recipe. So, I’m finally getting it up! This is such a simple meal. You can literally put it together in ten minutes. This meal is full of fiber, whole grains, complex carbs, protein, omega 3’s (healthy fats), and calcium.

It is great for a quick weekend lunch or a quick early dinner before an evening game or practice. It could also be a lighter but refueling option after a late game or practice (when dinner may have been eaten as early as 4:45 or 5:00 p.m. and it’s now 8:30 p.m. and the athlete has been playing for hours).

I actually made one of these this past Saturday. I was going to use the remaining tuna for a salad on Sunday, but when I went to the fridge, it was all gone. Apparently, Kyle is a fan as well… :)


So, here you go! The recipe for this super simple Ten Minute Mediterranean Tuna Melt!


Ten Minute Mediterranean Tuna Melt

Makes 1 sandwich (with leftover tuna to make 2 more sandwiches or a salad)

INGREDIENTS:

For the tuna salad:

  • One 5 ounce can of white chunk tuna (packed in water)

  • 2 tablespoons + 1/2 teaspoon plain yogurt (I used low-fat Greek)

  • 2 teaspoons Dijon mustard

  • 1/4 teaspoon honey

  • 1/2 teaspoon chopped fresh dill (+ more for sprinkling over top of sandwich)

  • 3 Cherub tomatoes, chopped into bite-size pieces

  • 2 tablespoons chopped Kalamata olives (5 Kalamata olives)

For the Sandwich:

  • 1 slice of whole grain bread

  • 1 slice of Provolone cheese


DIRECTIONS:

01_tuna plain.JPG
  1. Shred tuna in a small bowl.

  2. Using a toaster, toast whole grain bread to desired doneness.

02_tuna with dressing.JPG

3. Mix the tuna with the yogurt, dijon and honey.

4. Mix in the chopped tomatoes, olives and dill.

04_tuna on toast.JPG

5. Spread 1/4 cup of the tuna mixture out evenly over 1 slice of toasted whole grain bread.

6. Turn the oven to Broil, on high.

Tuna Melt Complete.JPG

7. Place toast on a small baking sheet and broil in the oven for about 1 minute until the cheese is all melty.

8. Enjoy!


Mushroom, Thyme & Goat Cheese Pizza

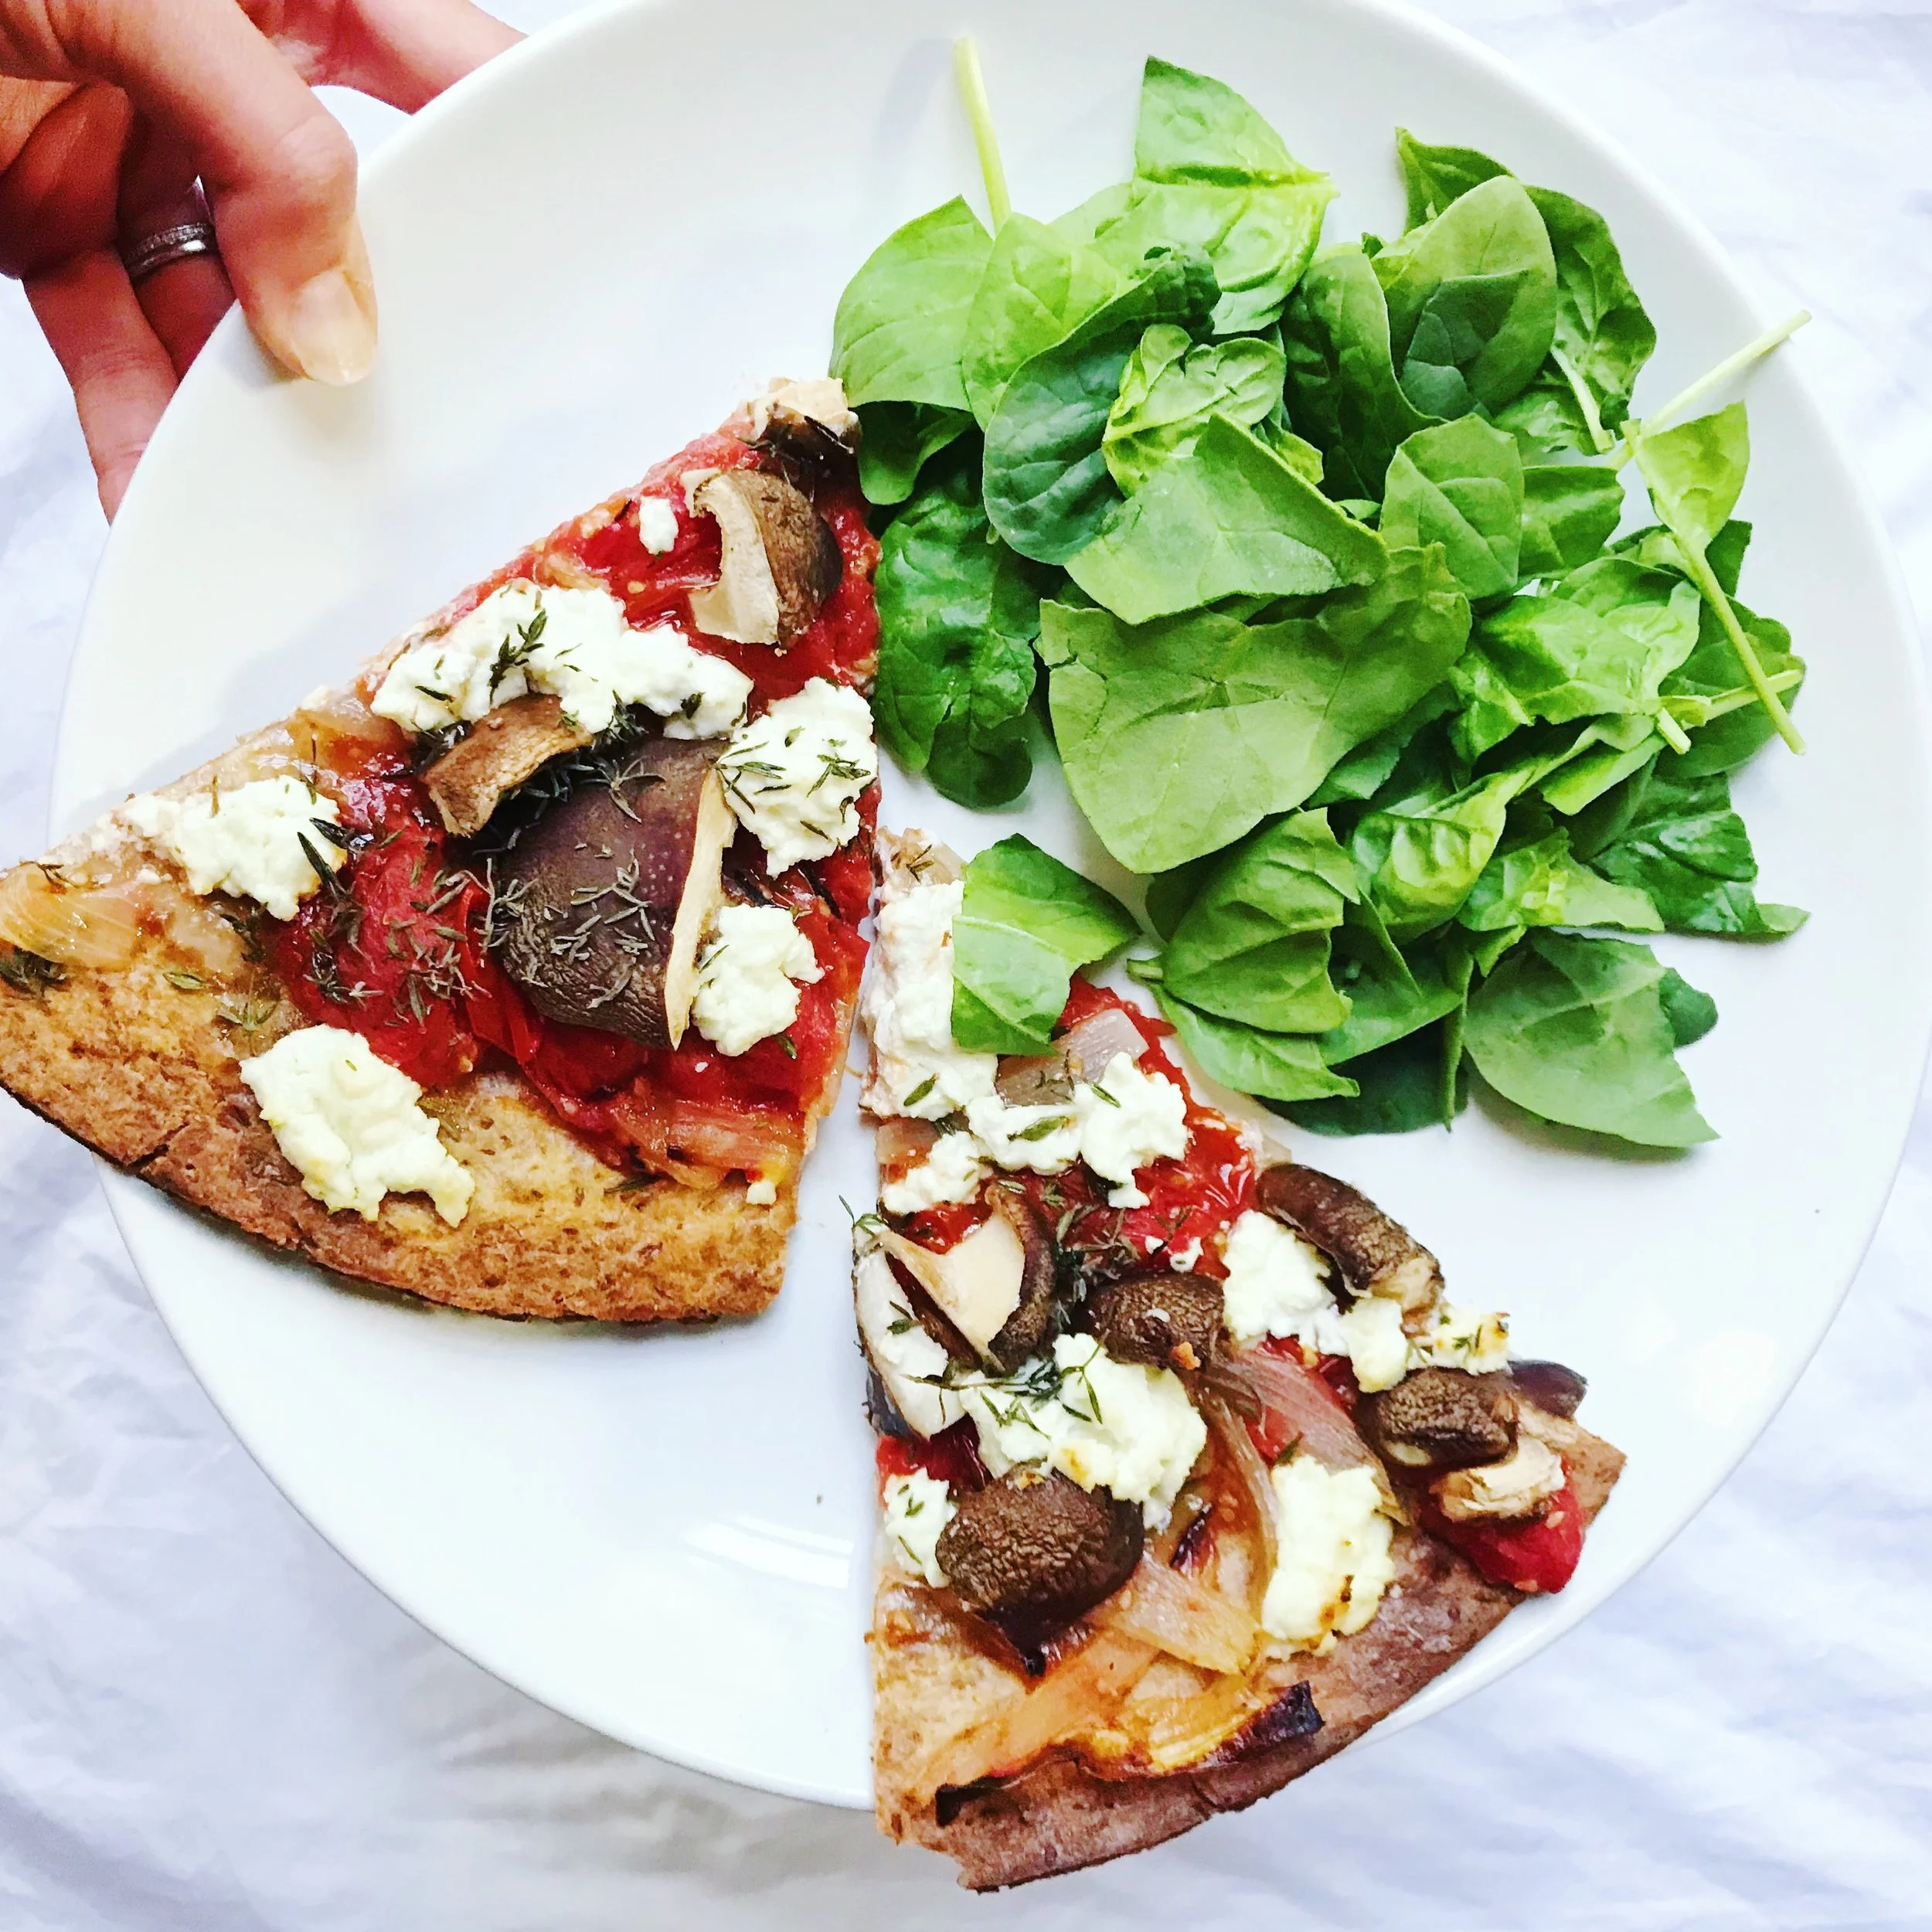
If you've been following along, you know that I have been working on, and loving I might add, this new pizza recipe.  The idea started from a magazine clipping I found in my old binder of recipes collected throughout college and grad school.  However, I've added and edited and played around with so many ingredients since then that I can't actually remember what the original recipe was, other than the fact that it used thyme and goat cheese.  Today I'm sharing with you the recipe results of many tests and tastes.  While this recipe is how I like it best, you can make a variety of little ingredient changes and I bet it will still be wonderful!  In fact, I alternate between two varieties and I want to share that quickly with you before diving into the recipe..

VARIETY #1:  THICK CRUST

Goat Cheese Thyme Pizza.JPG

One way I make this, and actually the first way I ever tried it, is on Whole Foods fresh pizza dough that I roll out and use for my crust (I hear Trader Joe's has a fresh whole wheat pizza dough too that is really good).  This version makes a thicker fluffier crust that yields a delicious pizza where the toppings kind of bake into the bread.  Ahh, so, good!  Not only is this option delicious but it can also be an easy way to get more calories and carbohydrates in your young growing athlete that has daily games and practices, depleted energy stores, and increased energy and nutrition needs. This option does take a little more time because you have to flour a surface and roll out the dough, but if time allows, I think it's absolutely worth it!  And, because it has a thicker crust, you or your athlete can throw on more favorite toppings!


VARIETY #2:  THIN CRUST

pizza_baked.JPG

My second variety is made on the Trader Joe's already-made whole wheat pizza crust that you find in the bread aisle.  I mostly like this version because of how quick and simple it is.  Wednesday night I cooked this variety for some girlfriends.  I got home around 6:00 p.m. and only had to focus on prepping the toppings.  Once the girls were over, I assembled the pizza and popped it in the oven for about 20 minutes and it was done.  I don't know about you, but that's my perfect idea of entertaining on a weeknight - a dish that everyone will enjoy and that allows you to be present with your company, not have to put all of your attention on cooking.  This is the variety that I'm going to share with you today!

PIZZA TAKEAWAY...

I always hear people say, "oh pizza is bad".  Oiy, feels like a punch to the stomach.  While, yes, some pizzas provide less fueling and health - promoting ingredients than others and when eaten too often, in too big of quantities over a long period of time can promote weight gain and other health concerns, I cannot say that pizza is "bad" and here is just one of my examples why.  This pizza uses a whole wheat crust from Trader Joe's (or something similar), easy to make homemade blistered & crushed tomatoes, sweet caramelized onions, soft crumbly goat cheese and fresh thyme.  And, while this is one of my favorite flavor combos, it is just one example,.  You can put any variety of your favorite veggies, cheeses and herbs and spices on here or throw in some chicken or lean ground beef if you want.  A perfectly fueling & filling option if you ask me!

So, here you go, my Mushroom, Thyme and Goat Cheese Pizza..

Happy Fueling!

Taylor


Mushroom, Thyme & Goat Cheese Pizza

INGREDIENTS:

TJ's crust.JPG
  • 1 Trader Joe's whole-wheat pizza crust

  • 1 teaspoon olive oil + 2 teaspoons olive oil + 1/2 tablespoon + 2 teaspoons olive oil (last 2 tsp optional)

  • 1 pint of cherry tomatoes

  • 6 - 8 ounces of mushrooms (your choice - I love picking a variety!), chop larger ones but smaller ones can be left whole

  • 1/2 of a medium white or red onion, sliced into half moons

  • 4 to 6 ounces of crumbled goat cheese

  • 1 1/2 tablespoons of fresh thyme

  • Juice from 1/2 of a lemon

  • Salt and pepper, to taste


DIRECTIONS:

1.  Preheat the broiler on high.

2.  Line a medium-size rimmed baking sheet with parchment paper or aluminum foil.

3.  To a medium-size skillet, add 1 teaspoon of olive oil and heat on medium-low heat.

4.  Add mushrooms to the heated skillet and cook for 10 to 12 minutes, until softened.

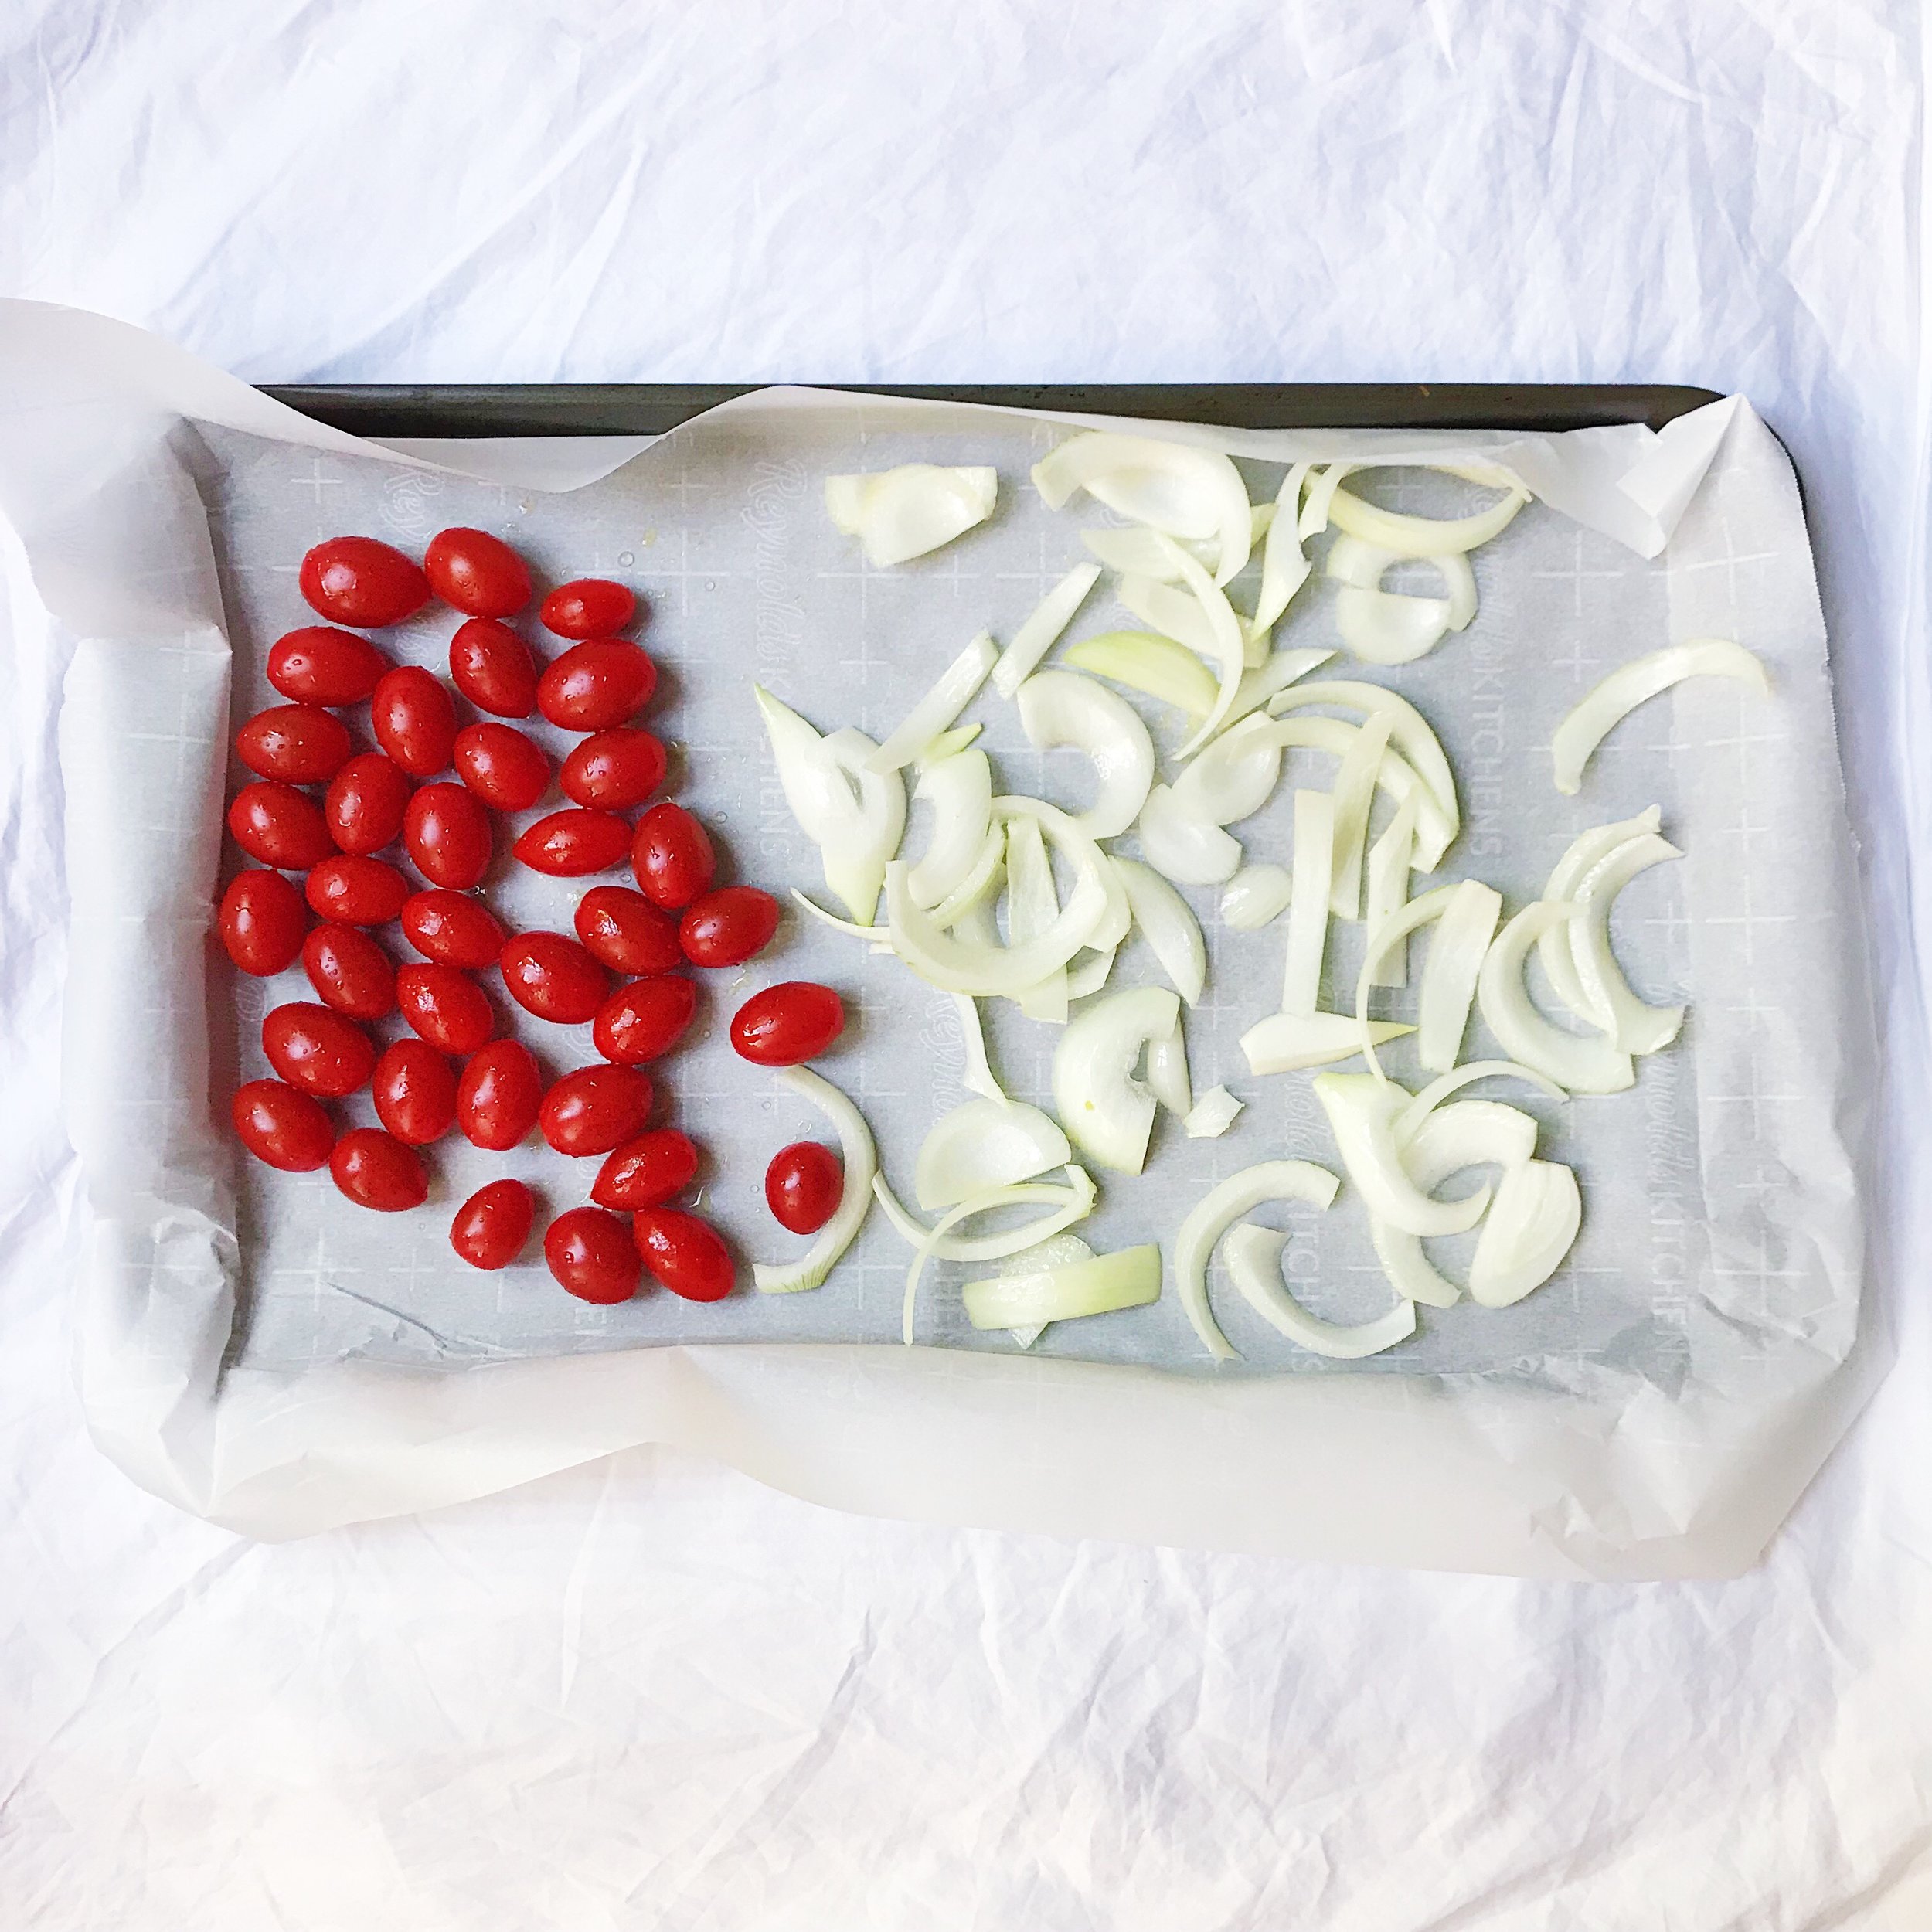
tomates_onions_pre roasted.JPG

5. While the mushrooms cook, in a medium-size bowl toss the cherry tomatoes with 1 teaspoon of olive oil and a sprinkle of salt. Spread the tomatoes out on half your lined baking sheet.

6. In the same medium-size bowl toss the onion slices with 1 teaspoon olive oil. Spread the onions out on the other half of the lined baking sheet next to the tomatoes.

7. Place the baking sheet in the oven and let cook under the broiler for about 10 minutes, until onions and tomatoes begin to charr and the tomatoes burst. Mix with a heat-proof utensil about half-way through.

8. Once mushrooms are done cooking, turn off the burner and set aside.

9. Once tomatoes and onions are done cooking, remove from the oven and turn off the broiler. Gently crush the tomatoes with a fork (being careful not to squirt yourself with tomato juice!) and set aside.

10. Change the oven setting to Bake at 400 degrees F.

pizza_tomates_onions.JPG

11. Place pizza crust on a pizza stone or a large baking sheet and brush with 1/2 tablespoon of olive oil.

12. Then spread the tomato - onion mixture in a thin even layer, leaving a little room on the edges.

pizza_prepped.JPG

13. Top pizza crust with mushrooms, crumbled goat cheese and fresh thyme. This picture was from a trial where I added the mushrooms raw. You can do this if pressed for time, but I thought the mushrooms had a better texture and were more thoroughly cooked when sauteed before adding to the uncooked pizza crust.

14. Place prepped pizza in the 400 degree oven and cook for about 20 minutes until the crust is crispy and the cheese has melted.

pizza_baked.JPG

15. Remove from the oven and slice into 4 to 6 triangular slices (or however many you want!)

OPTIONAL - you can whisk together the lemon juice and last 2 teaspoons of olive oil and drizzle over the pizza before slicing and serving. It adds a little pop of flavor!

pizza_sliced.JPG

16. I always like pairing my pizza with a different salad. Sometimes I keep it simple with spinach and extra virgin olive oil (EVOO) and sometimes I throw together lots of mix-ins and a fun dressing. Anything works!

17. Serve and enjoy!

Spinach & Feta Stuffed Salmon

The other week we had a friend couple over for dinner and I got to test our my Spinach & Feta Stuffed Salmon again.  It was a crowd pleaser and, therefore, a keeper.  I used my original recipe that I included in my "Dinner Without a Plan" post but doubled the ingredients so that it could serve 4. I've included my updated recipe below.  Hope you enjoy it!

Stuffed Salmon and veggies.JPG

SPINACH & FETA STUFFED SALMON

Serves 4

 INGREDIENTS:

  • 1 teaspoon extra virgin olive oil

  • 6 cups of fresh spinach

  • 1/2 cup part-skim ricotta

  • 1/4 cup crumbled feta

  • 1/3 cup pine nuts

  • Four 6-ounce salmon filets (I used Coho salmon)


Toasted Pine Nuts.JPG

DIRECTIONS:

salmon on the grill pan.JPG
plated_side view.JPG
  1. In a medium-sized skillet, heat 1 teaspoon of olive oil.

  2. Add the fresh spinach to the skillet and cook until the spinach starts to wilt down, about 4 minutes or so.

  3. Add the ricotta cheese and feta cheese to the spinach and mix until it is all starting to melt and blend together and the spinach is completely wilted.

  4. Meanwhile, while the spinach mixture heats, add your pine nuts to another small skillet and toast on medium-low heat until they start to brown and become fragrant, about 4 minutes (watch these and you'll know when they are done. They start to brown and you can smell the nuttiness - so good!). You don't need to add any oil to the skillet because as the nuts heat they release their natural oils into the pan. I would actually take them off the heat before they are completely toasted because you will be toasting them again with the salmon and you don't want them to burn. When the pine nuts are done add them to the spinach & cheese mixture, incorporating well with a rubber spatula, and set aside.

  5. Now prep the salmon. Lay the filets out on a cutting board or baking sheet skin side down. Next take a small sharp knife and cut a slit lengthwise down the top of the filet, making something like a pocket to stuff some of the spinach mixture in.

  6. Divide the spinach mixture up evenly between the four salmon filets, stuffing each with a good portion of the spinach mixture (and some will rest on top of the salmon like in the picture).

  7. Spray a grill pan with vegetable oil or canola oil, heat it to medium-high heat and turn the oven broiler on high.

  8. Once the grill pan is hot, add your salmon filets and let those cook for about 5 to 8 minutes until you start to see it cook / turn light pink from the bottom up.

  9. Place your grill pan with the salmon filets under the broiler and let that cook for about 1 1/2 minutes or until the filets reach your desired doneness.

  10. When the filets have cooked to your desired doneness, use oven mitts to take the grill pan out of the oven. Allow the salmon to rest while you plate the rest of your meal.

  11. Serve the salmon hot and enjoy!