Cinnamon Apple Tarts

If you haven't already realized or, if you are new to my blog, I'm all about delicious but simple and stress-free recipes and meals.  I eat most foods but, in this space, you'll find a bit healthier recipes.  I'm out to prove that healthier meals can be delicious, that they don't equal deprivation AND that they don't have to be complicated.  And, seeing as my background is in mainly wellness, exercise and sports nutrition (both adult and pediatric), my recipes are all created with this theme in mind.  I have a few principles that I follow when thinking up dinners,  principles that work whether I am cooking for one, cooking for the family, or cooking for an entire house of guests.  I won't go into detail about them today but I can tell you that following these is what allows me to create balance and keep flavor at our table each week.  These principles are getting summed up in an upcoming post, so stay tuned!  In the meantime, I hope you enjoy today's recipe, these Cinnamon Apple Tarts, that are just sweet enough, light enough and simple enough to make the menu of many celebratory and more time-consuming meals. 

A little story behind their creation...

AC Tarts Cover photo 2JPG.JPG

These apple cinnamony treats came about when Kyle and I were having my Bible Study leader and her husband over for dinner.  I have been in her Bible Study for probably about 5 years to the point that she is like family.  She even flew up to Memphis to attend my mom's funeral, a woman she had never met.  I got to know her husband through being at their house every other week for Bible Study and through our church.  After I met Kyle, they welcomed him into their lives, joining us for dinners and brunches and lending words of wisdom when we needed it.  Her husband actually ended up being one of the ministers that married us.  So, with all of this to say, these were some very special dinner guests.  That night I, with Kyle as my sous chef :) , made some of my favorite dishes - a Roasted Beef Tenderloin with a Rosemary Chocolate and Wine Sauce (thank you, Ellie Krieger!!  This dish is delicious and one of my favorites for special occasions and entertaining!), roasted root veggies, spinach and brown butter gnocchi and a mixed greens salad.  This might sound complicated but it fits perfectly with those "Three Principles for Simplified Dinners".

For these tarts - the key to preparing them is pulling the pastry dough out of the freezer before dinner begins because they need about 40ish minutes to thaw.  You can either have your apples already sliced or do a quick slice after dinner before throwing them in the oven.  On this particular occasion, I had the pastry thawing and then, as everyone was taking their last bites of dinner, I tucked away into the kitchen, assembled the tarts (using apples I had sliced before dinner) and then baked them in the oven for about 15 minutes while I joined the rest of the conversation.  When they were done I broiled them for just a minute and then plated them and served each with a ramekin of cold and creamy Blue Bell vanilla bean ice cream (everything is better with Blue Bell in this house).  They were simple and light, the perfect ending to a satisfying and filling meal.

So, here you go - my recipe for Cinnamon Apple Tarts.  I hope they bring your future dinners many happy endings :)

Happy Fueling!

Taylor


CINNAMON APPLE TARTS: A LIGHT, FLAKEY & SUBTLY SWEET DESSERT

Makes 18 tarts 

INGREDIENTS:

CA Tarts Ingredients.JPG
  • 6 rectangles of a puff pastry sheet, thawed for about 45 minutes

  • 1 red apple (like golden delicious)

  • 1/2 green apple (like granny smith)

  • 1 teaspoon ground cinnamon

  • pinch of regular sugar

  • 4 teaspoons honey


DIRECTIONS:

1. Preheat oven to 400 degrees F and dust a baking sheet with flour.

2. Using 6 of the long rectangular sheets of puff pastry, cut each into 3 smaller squares (should end up with 18 squares).

3. Slice each apple in half. Then, place cut side of each apple half on cutting board cut into another half lengthwise, along the length of the core. Keeping apple in that same position, begin slicing from the side you just cut, inwards. Repeat with each section of apple so that you have 32 red apple slices and 16 green apple slices.

CA Tarts apple pasty 45 angle.JPG

4. Layer the top of each pastry square with 3 apple slices - 2 red and 1 green.

5. Drizzle apple slices with half of the honey and sprinkle with cinnamon (I really just eyeball the honey I drizzle on each tart. Don't stress about being super precise - just have fun drizzling a little over each tart, saving enough to drizzle each again in a little bit!)

6. Place the pastry squares on the baking sheet and bake in the preheated oven for about 8 minutes.

7. At 8 minutes, remove the tarts, drizzle with remainder of the honey and bake for about 5 - 8 minutes more.

8. After baking, remove tarts from the oven and turn the oven to broil. Sprinkle each tart with a little granulated sugar and place under the broiler for about 30 to 60 seconds until the tops are browned and caramelized.. Make sure to watch them so they don't burn!

AC Tarts cover photo.JPG

9. Remove finished tarts from the oven and let sit a moment while you scoop out ice cream, pour your coffee, or put together whatever you choose to serve them with :)

CA Tarts Plated Aerial.JPG

10. Serve and enjoy!

SERVE IT AGAIN!

Store any uneaten tarts in an air-tight container in the refrigerator.  When ready to eat again, remove from fridge and place on foil or baking sheet.  Reheat in a preheated 350 F oven for about 10 minutes.

Breakfast anyone?  While not the best pre or post - exercise breakfast, these make a great accompaniment if hosting a big weekend brunch or they serve as perfect leisurely weekend homemade pastry.

Roasted Red Pepper & Pesto Chicken Salad

A chicken salad with pesto and home roasted red peppers.  It's mayo-free and packed with flavor!

Friends, this chicken salad is so scrumptious. I wish I could hand you a sample through the screen!  I tested this recipe a few times because I couldn't get the chicken how I wanted it.  I quickly learned that if the chicken isn't cooked like you want it then the final product will not be exactly what you want.  However, once I mastered the basic chicken breasts, the rest of the recipe was a breeze!  You can learn how I perfected the chicken breast and find my recipe for fool-proof tender juicy chicken by clicking here!

After I determined the best way to cook my chicken I added just TWO simple ingredients and, voila!, a delicious, tender, flavor-packed chicken salad.  It's the perfect protein-packed AND flavor-packed lunch to keep you energized throughout your day. 

I love chicken salads like this because they are such an easy way to get my protein at lunch.  I especially appreciate this when I have had an intense resistance workout early in the morning before work.  Because our bodies can only utilize about 20 - 30 grams of protein at one time for muscle building and repair, it's important to have your protein present in not only the meal following your workout but also each meal and snack throughout the day (if you're trying to build or simply maintain muscle mass for your sport, personal goals, or general health and well-being).  This is a protein - packed recipe that does not disappoint!  It stays tender and moist throughout the week and it keeps its flavor while passing on the higher saturated fat mayonnaise common in so many chicken salads.  

This recipe usually gets me about 3 to 4 lunches, depending on how big I make my portions :).  I really do make this all the time and am super excited to share it with you today!  Make sure you read to the very end for ways to use this one recipe for a variety of deliciously simple meals throughout the week!

Happy Fueling!

Taylor


ROASTED RED PEPPER & PESTO CHICKEN SALAD

INGREDIENTS:

  • 1.75 pounds raw boneless skinless chicken breast (should make about 3 cups cooked shredded)

  • 1 teaspoon olive oil

  • 1/2 of a fresh lemon, cut into quarters

  • 1/8 teaspoon salt

  • 1/8 teaspoon pepper

  • 2 medium red bell peppers

  • 4 tablespoons jarred pesto

DIRECTIONS:

Baked Tender Chicken.JPG

1. Prepare chicken by roasting according to my Tender Juicy Oven - Baked Chicken Breasts recipe.

Diced Roasted Peppers.JPG

2. While the chicken roasts, prepare your roasted red bell peppers by following the recipe in my DIY Roasted Red Bell Pepper post!

Shredded ChickenJPG.JPG

3. Once the chicken is cooked, allow to rest for about 5 minutes.

4. Then, using two forks, shred the chicken to bite-size pieces. The chicken should still be hot and should shred easily.

Add Pesto to Chicken.JPG

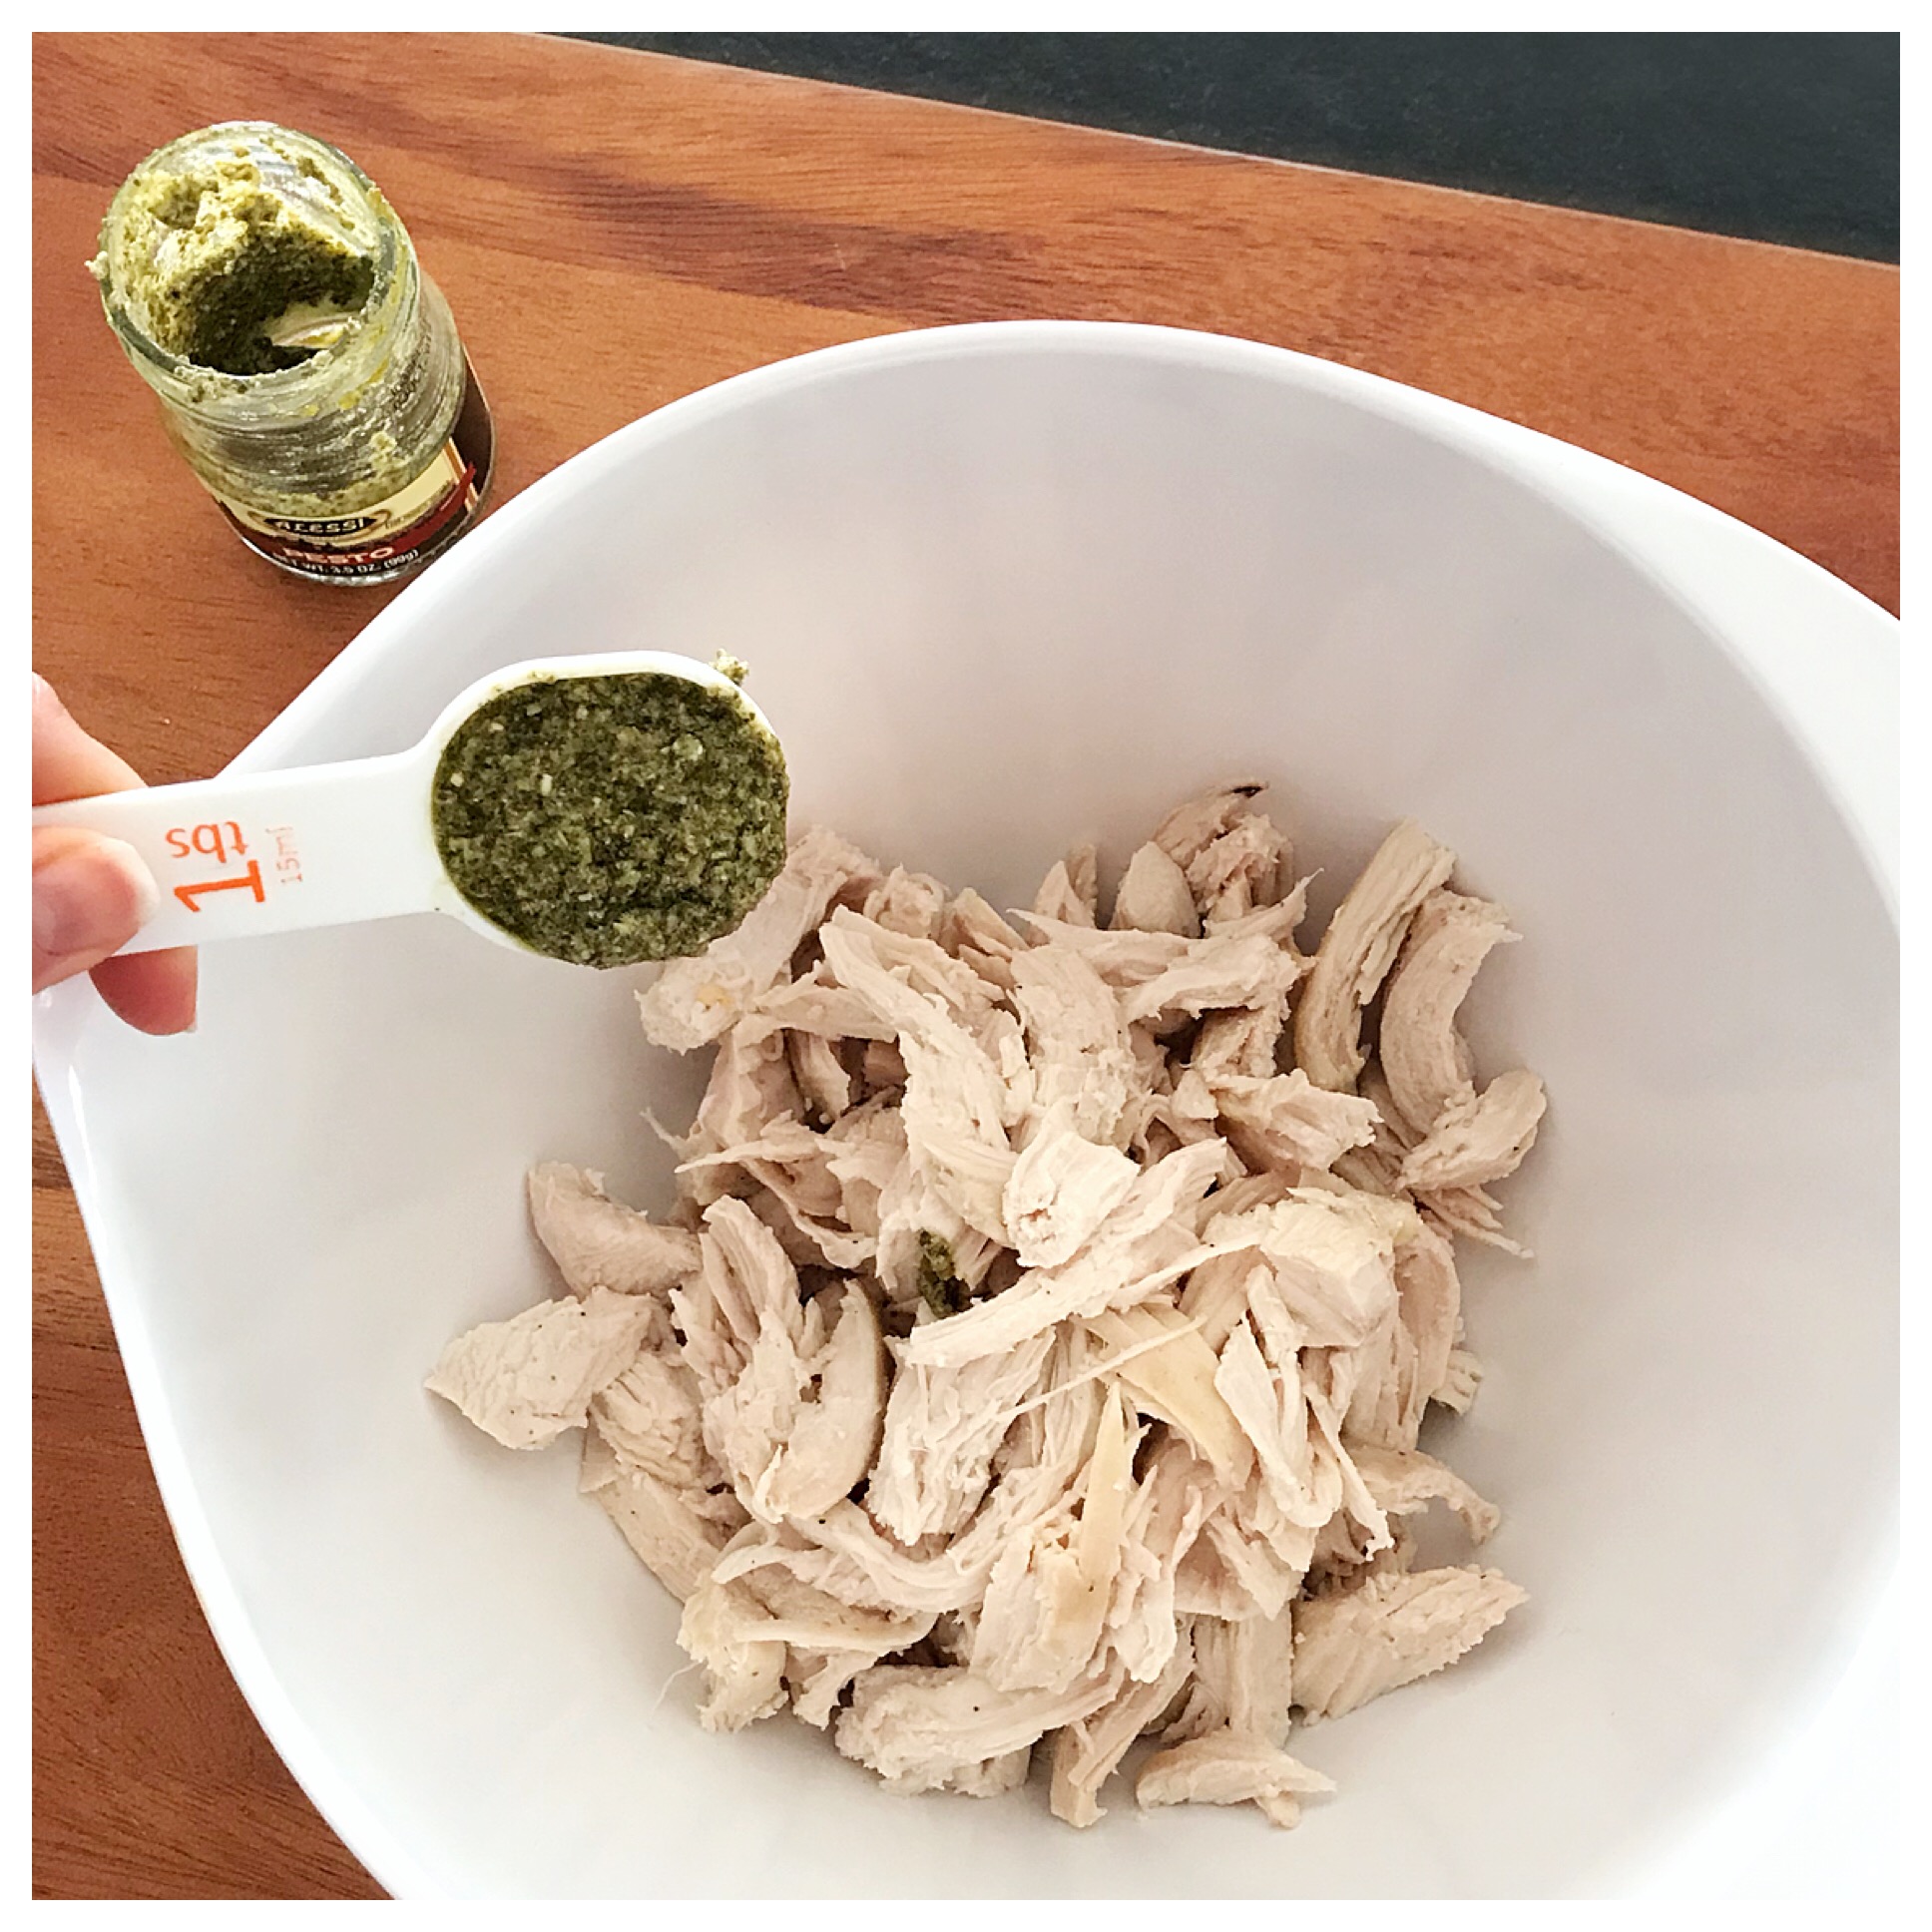
5. Add the pesto to your warm chicken and toss to combine. You want the chicken to still be warm so that it really absorbs all of the flavors in the pesto. Mmmmmm :)

Add Peppers to Chicken.JPG

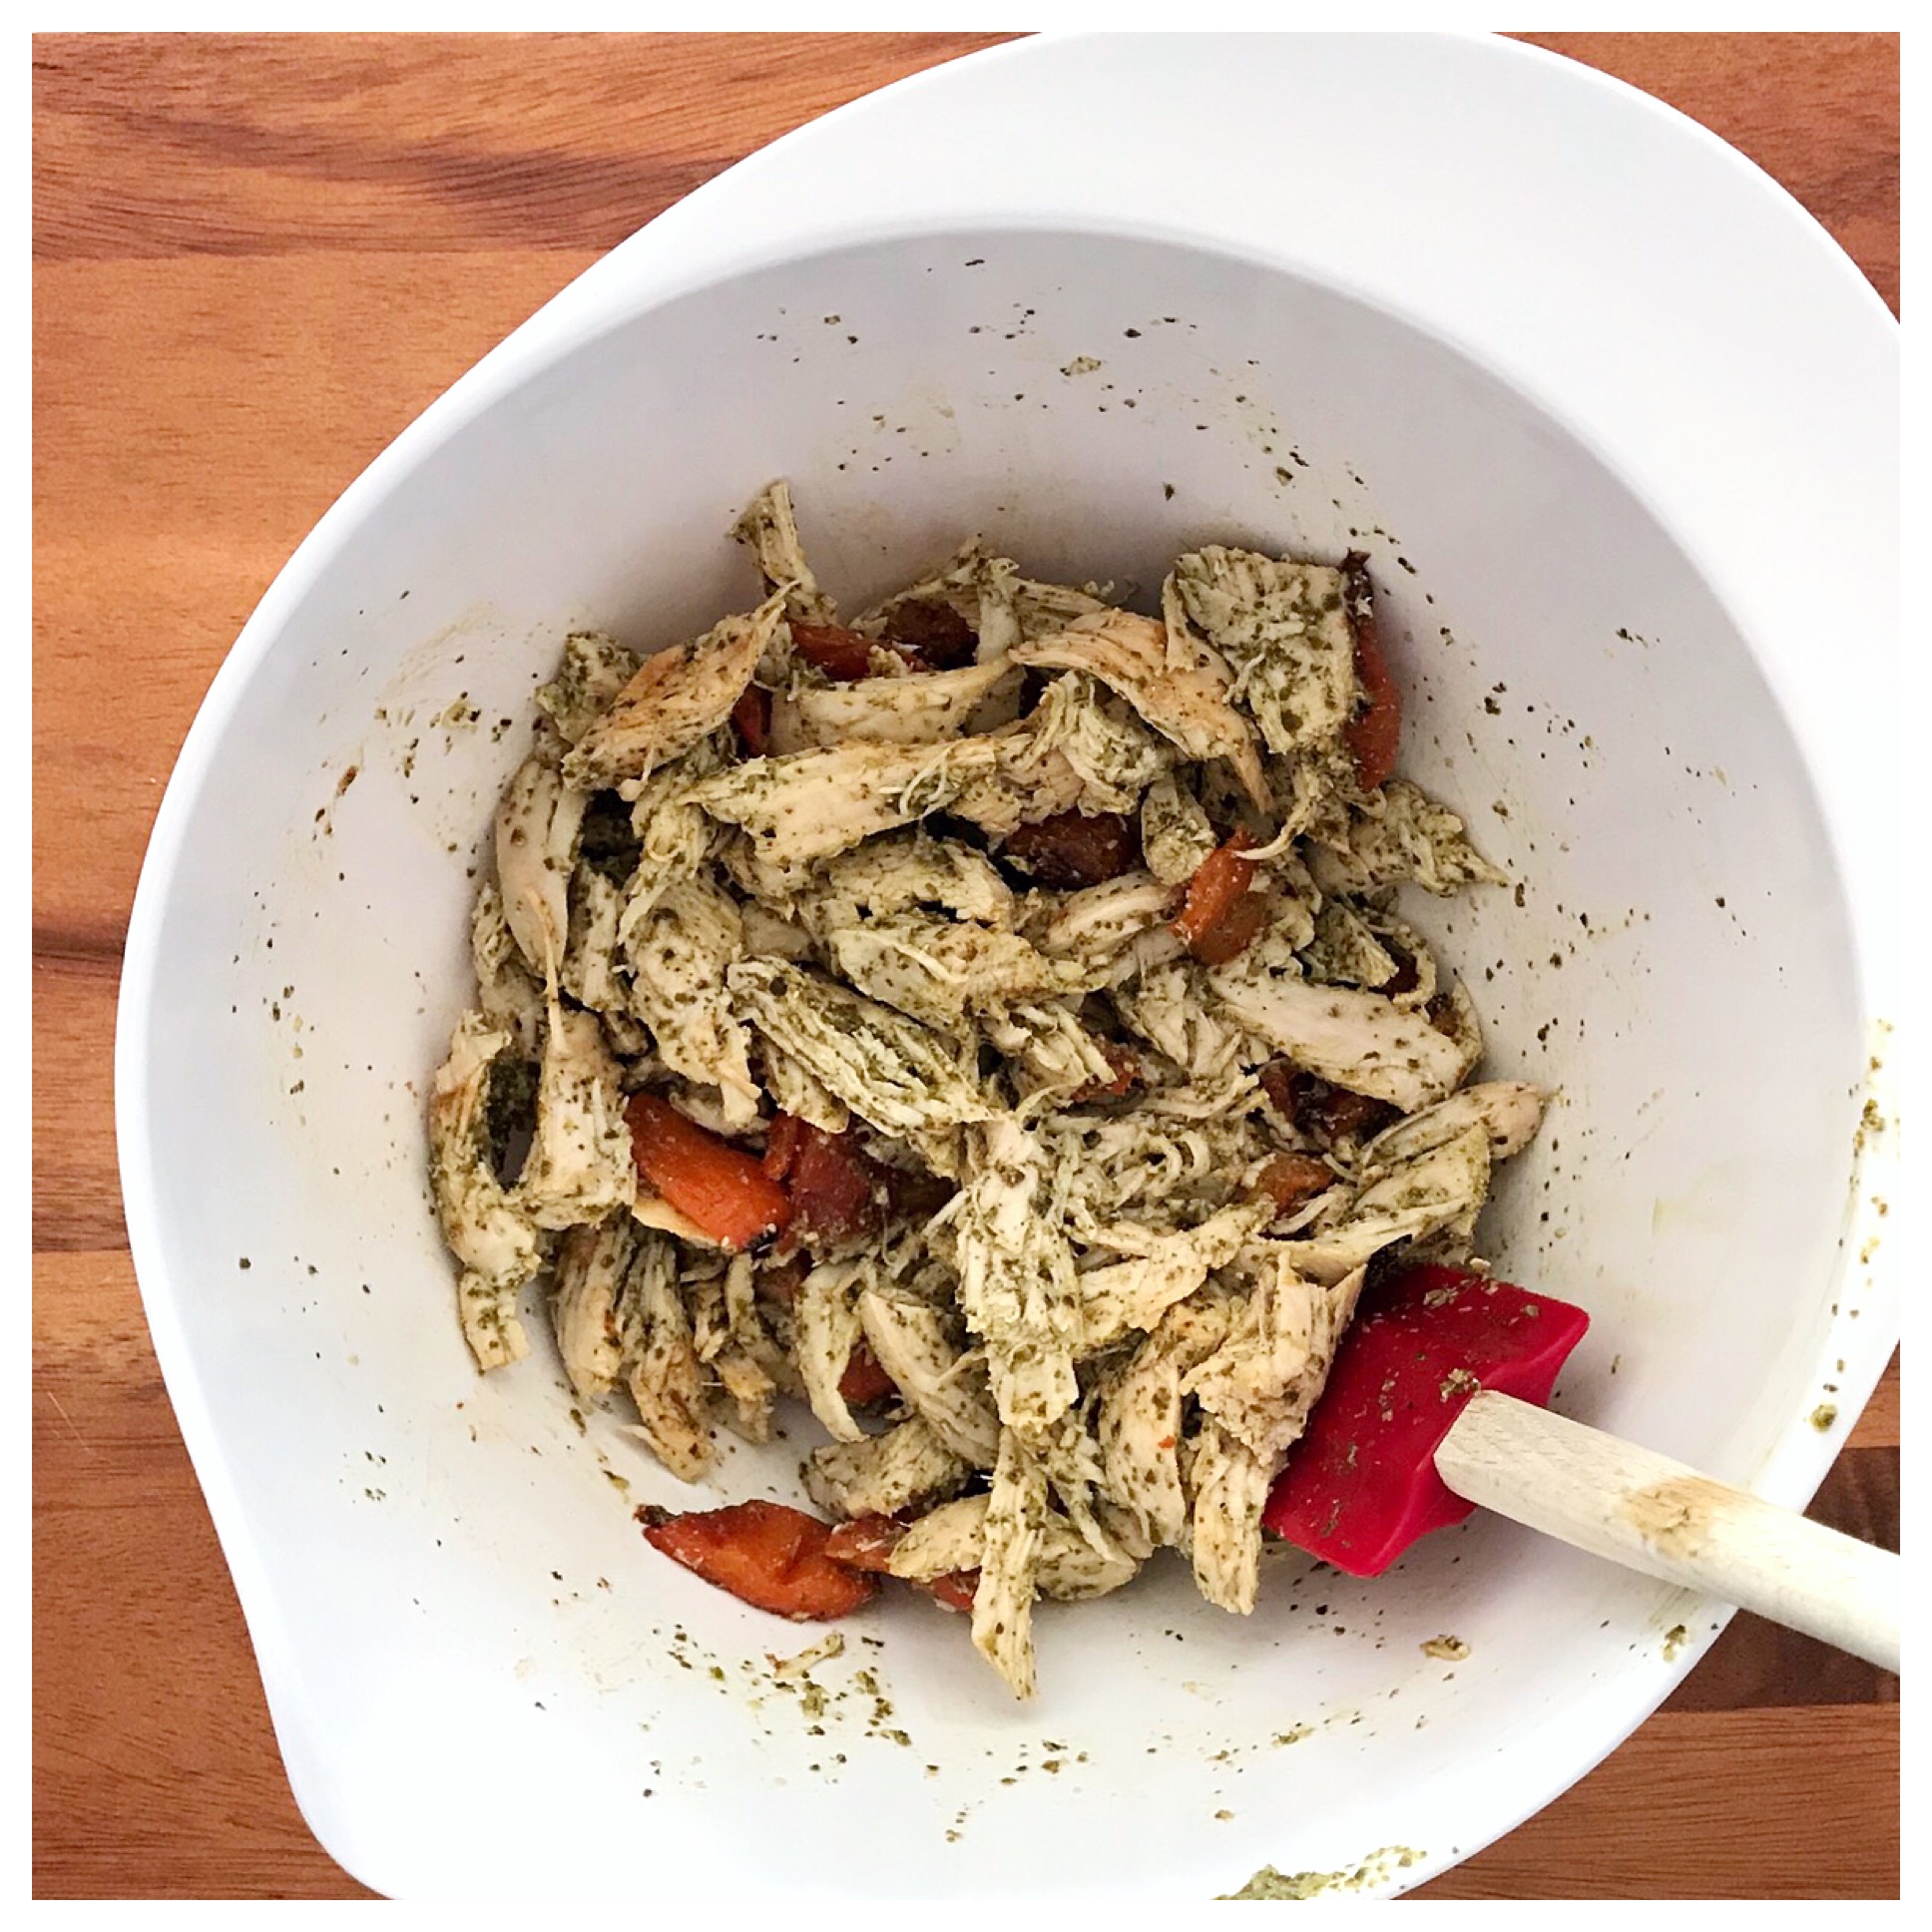
6. Add in your warm roasted red bell peppers.

Chicken Pesto Peppers.JPG

7. And toss to combine until all ingredients are well incorporated.

FINAL - Roasted Chicken & Red Pepper Pesto Salad.JPG

8. Serve immediately or store, covered, in the refrigerator for easy lunches throughout the week!

IDEAS FOR MIXING IT UP!

I love recipes that can be incorporated numerous ways to make a variety of dishes.  This recipe happens to be one of my favorites of these type of recipes.  Here are all different ways you can incorporate this chicken salad to keep dishes interesting, delicious and energizing throughout the week!

  • Serve it on its own with whole grain crackers and a side of fruit

  • Warm it up (or serve immediately after preparing) and serve it over penne pasta for dinner

  • Keep it cold and toss in bowtie pasta for a fun picnic lunch

  • Serve it over a bed of spinach and add small cubes of mozzarella cheese for a Spinach Chicken Salad

  • Pile it between two slices of your favorite bread, add a slice of mozzarella cheese or sprinkle shredded mozzarella cheese over the top and place in a panini press (or press it in a skillet over the stove) for a warm Italian Pesto Chicken Panini


NUTRITION NOTES:

Chicken:  protein, vitamin B12

Pesto:  monounsaturated fats, vitamin E

Red Bell Pepper:  vitamin C, vitamin A, fiber


Pesto Roasted Cauliflower

Roasted Cauli side shot.JPG

Wow, it was a fast moving February, which I'm pretty sure is going to turn into a fast moving March!  Kyle and I accomplished a trip to Houston and a trip to Mexico City, Birthday celebrations for him, engagement celebrations for friends, a new Bible Study, lots of work travel for Kyle and tons of work checklists and Board meetings for me.  Wowzers.  And in one short week we are taking off to Israel!  Detailed meal planning has been at an all-time low and needless to say, my quick and simple favorites have really come to the rescue lately!

One fairly new quick and simple side that I want to share with you today, and that I have been making on the regular lately, is my Pesto Roasted Cauliflower.  If you have noticed in my posts, I have been making a lot of roasted cauliflower this year AND using lots of pesto (it is such a SIMPLE way to add a LOT of flavor!).  After basically making these two components a weekly constant, Kyle and I then went to grab a quick bite at Celebration and one of their vegetables of the day was a pesto roasted cauliflower.  Hello!?!?!  Why had I not thought of that?!

So, the next week pesto roasted cauliflower was absolutely on the menu.  I love this dish because it carries so much flavor on its own that you don't need to worry about having super flavor-packed fancy items to go with it.  I love this as a side to beef or pork tenderloin, chicken or salmon, or added into a bowl for lunch.  You could even chop it up finely and add to scrambled eggs in the morning.  Such a good prepped veggie to have around for the week.

So, here you go - my recipe for Pesto Roasted Cauliflower...

Happy Fueling!

Taylor


PESTO ROASTED CAULIFLOWER

INGREDIENTS

  • 1 small to medium head of cauliflower, chopped and rinsed (about 4 to 5 cups raw)

  • 1 tablespoon olive oil

  • 1 tablespoon + 1 - 2 teaspoons jarred pesto

DIRECTIONS

  1. Preheat oven to 375 degrees F and line a large baking sheet with foil or parchment paper.

  2. In a large mixing bowl, drizzle cauliflower with 1 tablespoon olive oil and toss to coat.

  3. Spread the cauliflower out evenly over the baking sheet and roast in preheated oven for about 20 minutes (see my first picture in this post for a visual).

  4. After 20 minutes, remove cauliflower from the oven, scoop the cauliflower into that same mixing bowl, add the pesto, and mix with a rubber spatula to coat the cauliflower evenly with pesto.

  5. Scoop the cauliflower back onto the baking sheet, place back in the oven and roast for another 10 to 15 minutes, or until fork-tender and some of the smallest pieces are getting crispy.

  6. Remove baking sheet with cauliflower from the oven and allow to sit about 5 minutes.

  7. Serve immediately or allow to cool completely and store in airtight containers in the refrigerator for meals later in the week!


NUTRITION NOTES

Cauliflower provides a lot of VITAMIN C and FIBER

Vitamin C... helps strengthen the immune system and prevent infections

Fiber... great for a healthy digestive system, helps fill you up, can help lower cholesterol