Simple Seven-Ingredient Tuna Burgers

5_Burgers Done Side View.JPG

I know that tuna burgers may not be the most glamorous idea around but this recipe takes them up just a notch, adding lots of flavor, a little texture, and a simple weekday or weeknight meal! I discovered tuna burgers in college, actually. We had a recipe for one in my food science class and my group was in charge of making it. After my very reluctant first bite I was pleasantly surprised to discover that I liked it and, not only did I like it, but I realized I would actually look forward to eating something like this on a regular basis. These tuna burgers, with a few easy adjustments, began to be a college dinner staple for me. In the hot Texas summers I could get home and easily cook up two or three or four of these so I would have leftovers to reheat for the week. Because it was so hot this particular summer, I would make a huge crisp cool salad with mango and bell peppers and some feta and place this warm tuna burger right on top. The flavor combos were perfect! Sometime after college and on into grad school I lost the recipe and stopped making the burgers. However, this past year, looking for more quick and simple meal ideas, I remembered these burgers and began pairing ingredients together to make my own version and bring it back. This is my new tuna burger recipe. It’s an easy source of protein with a little carbohydrate and just the right amount of flavor that makes it perfect any night of the week. You can incorporate it in a salad, on a burger, or on its own with a couple of simple sides. It’s super easy, super versatile, and something everyone might like, from the parent to the young athlete to the adult athlete. So, here you go, the recipe for these Simple Seven-Ingredient Tuna Burgers.

Happy Fueling!

Taylor

SIMPLE SEVEN-INGREDIENT TUNA BURGERS:

A Quick Recipe for You & Your Young Athlete

Makes 2 patties

INGREDIENTS

01_Tuna Burger Ingredients.JPG
  • 8 oz canned light tuna

  • 1 whole egg + 1 egg white

  • 1 tablespoon Dijon mustard

  • 1 teaspoon jarred minced garlic

  • 1/4 + 2 tablespoons cup plain bread crumbs

  • 1/2 cup diced white onion

  • 3 teaspoons olive oil

DIRECTIONS

  1. Preheat oven to 350 degrees F.

  2. Line a medium baking sheet with foil or parchment paper and set aside.

02_Tuna mix.JPG

3. In a medium-size mixing bowl, mix together the tuna, eggs, Dijon, garlic and bread crumbs.

4. In a medium skillet, heat the 1 teaspoon of olive oil on medium heat.

5. Add the onions to the heated skillet and cook for about 10 minutes until the onions have started to brown.

6. Add the cooked onion mixture to the tuna mixture and stir to combine all ingredients.

7. Heat the last two teaspoons of olive oil on medium heat in the medium skillet that you cooked the onions in.

04_Burgers on Skillet.JPG

8. Scoop out about 1/2 cup of the tuna mix , shape into a medium-size patty and place on preheated skillet. Do the same with the remaining tuna mixture. If not enough space in your skillet, you can cook the patties one at a time.

9. Cook the patties in the heated skillet for about six minutes per side until browned on both sides.

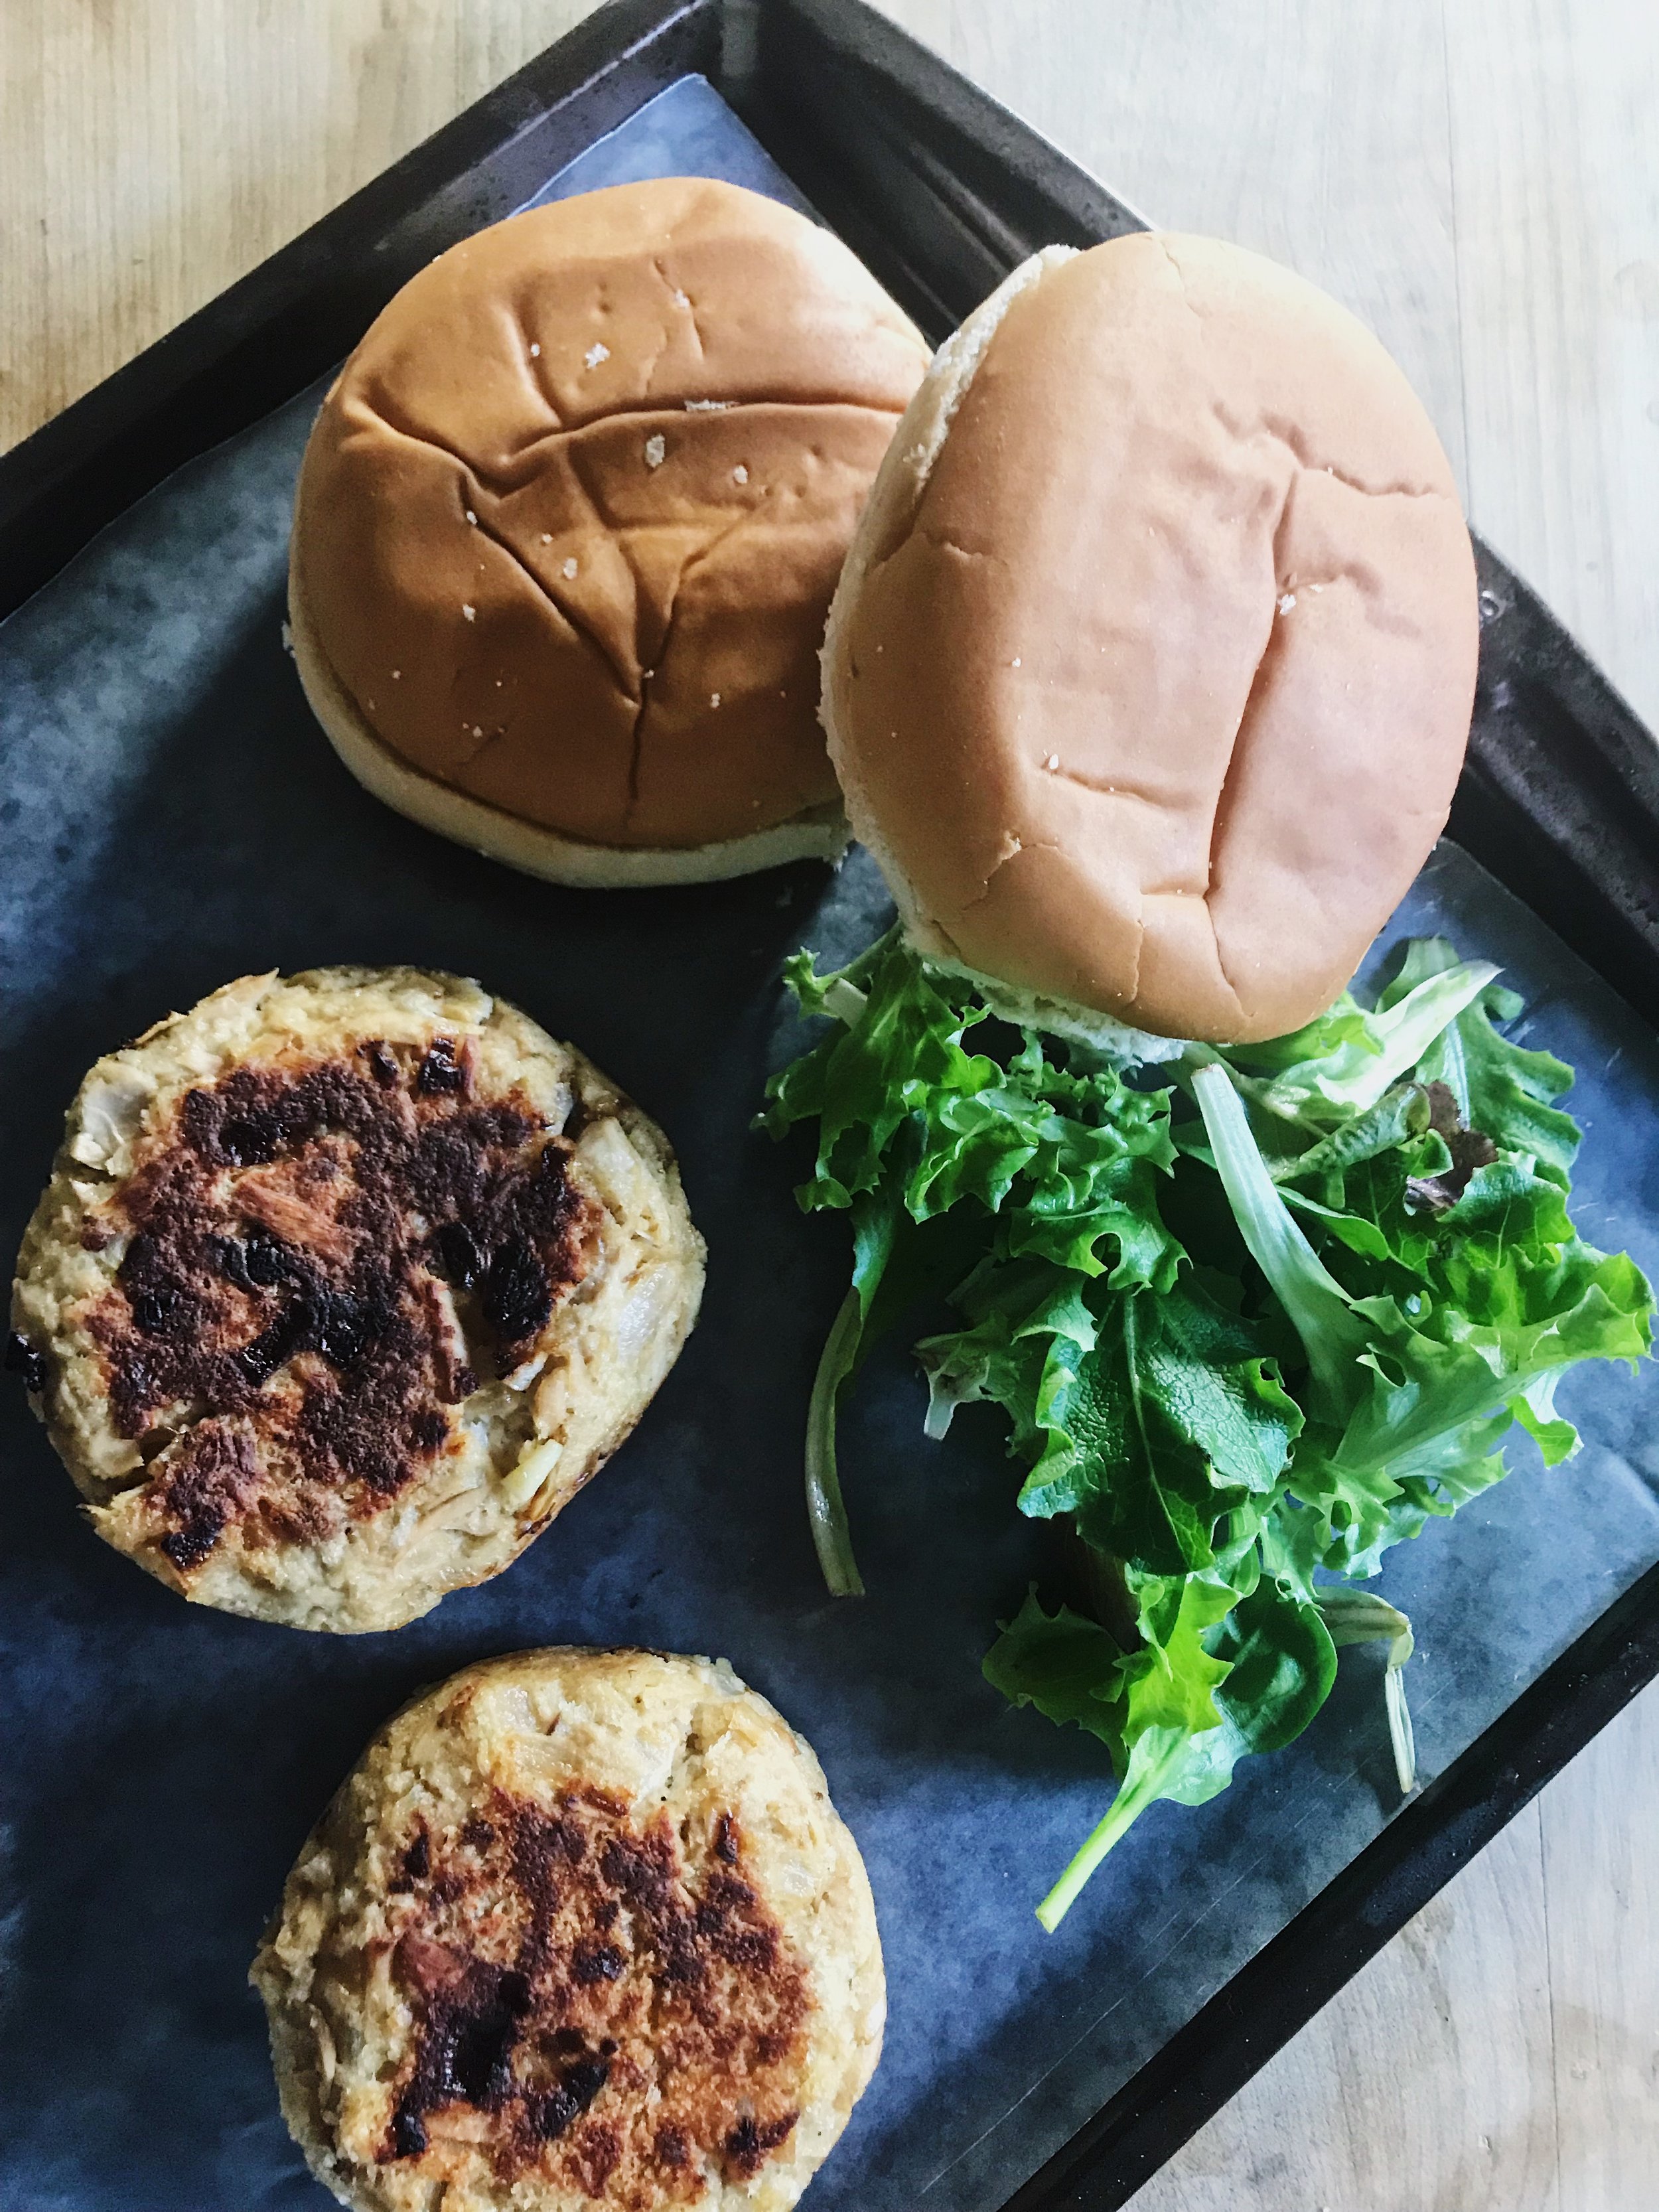
10. Place patties on lined baking sheet and bake in preheated oven for about 4 to 6 minutes.

5_Burgers Done Side View.JPG

11. Remove from the oven and serve as burgers with your favorite toppings and sides.

12. Enjoy!

Make It Again!

07_2 Burger Board.JPG

These tuna burgers can be served lots of different ways, which is one of the reasons that I love them! Serve over a crisp cool salad in the summer or serve them like a burger bar, providing lots of different toppings to choose from. I love them simple with lettuce, tomato and maybe mustard or I have served them with a Greek Ziziki sauce, which has also been excellent! Or, you can choose to keep it really simple and serve on their own with a few yummy sides!

My Go-To Hearty Kale Salad

If you have been following along lately, you know that I have been throwing together a lot of salads. They are just so quick and easy and versatile. You can throw anything in them and run out the door. And, I’m not one that can always go out to lunch, so it’s great to have this ready to go at work. I always include one or two things with it, like an apple or a yogurt, or a granola bar or crackers and hummus, but this salad really helps satisfy me and keep me energized for the rest of my day.

Kale+Tahini+Caesar_dressing+side.jpg

To me it’s hard to prep salads ahead of time because so many of the lettuces like spinach and mixed greens can get wilty (is that a word? I’m goin’ with it) really quickly. The great thing about kale is that I can go ahead and wash it, chop it and throw it in a bowl, or put together and dress my salad completely and it will still be good in a couple of days! For all of these reasons, I have been loving this kale salad. This is the variety I typically make but I put a few other varieties at the end of this post. You can either prep the greens and toppings and store separately, allowing for more variety during the week or go ahead and throw it all together in one large bowl! When I use this creamy tahini caesar (which I tell you in my post is by Cookie & Kate) I usually store it separately. If using a balsamic or some sort of vinaigrette, I’ll often go ahead and massage the dressing into the kale. It helps break it down a little bit so it is not so tough when it’s time to enjoy it.

Today I’m sharing this tasty, fueling and satisfying go-to salad with you. I hope you enjoy!

Happy Fueling!

Taylor


My Go-To Kale Salad with Creamy Tahini Caesar Dressing

Makes about 4 entree-salads (if using about 2 1/2 cups per salad)

INGREDIENTS:

  • 2 Balsamic Roasted Portobello mushrooms (recipe and 3 ingredients in this post)

  • 1 batch of Tahini Caesar Dressing (recipe & ingredients in this post, original recipe by Cookie & Kate)

  • 7 cups chopped Lacinato kale (about 1 bunch)

  • 5 cups lightly packed Romaine lettuce

  • One 15-oz can chickpeas, rinsed and drained

  • 1 pint cherry tomatoes, halved

  • 1/4 cup grated parmesan cheese

  • 1/4 cup pumpkin seeds (optional but I LOVE adding these!)

Directions:

  1. Preheat oven and roast mushrooms according to directions linked above.

  2. While the mushrooms roast, whisk together the ingredients for the Tahini Caesar dressing in a small bowl (recipe linked above). Keep in the bowl or pour into a small mason jar (or other airtight container) to store and use throughout the week.

  3. Add the pumpkin seeds to a small skillet and heat on medium heat. Cook about 5 minutes until the seeds begin to “pop”, brown and you start to smell their rich nuttiness. Yum! You don’t need to add any oil to the skillet because seeds naturally contain oil that will start to come out as the seeds begin to heat up.

  4. Add the kale, romaine, chickpeas, tomatoes, parmesan cheese, roasted chopped portobello mushrooms and pumpkin seeds to a large mixing bowl and toss together with tongs or salad spoons to incorporate all ingredients.

  5. Store the salad and dressing in the refrigerator separately to use throughout the week. Or, if serving for a group immediately, add dressing to the salad and toss until all well-combined. I would start with about 1/4 cup of dressing and toss all together. Add more dressing as needed or let your guests add it separately at the table!

  6. Enjoy!

Nutrition Notes:

Kale: Did you know kale is a non-dairy source of calcium?! I try to incorporate it into any of my athletes meals that don’t eat dairy but will eat kale (that’s not often, ha, but I’ll take it when I can!) This leafy green also contains, vitamin K, vitamin A, vitamin C, iron, magnesium, potassium, copper and manganese.

Tomatoes: vitamin C, lycopene, fluid, fiber, vitamin A, vitamin K, potassium

Chickpeas: protein, thiamin, niacin, riboflavin, folate, copper, manganese

Pumpkin Seeds: protein, fiber, monounsaturated fats & some omega 3’s, magnesium, iron, potassium, zinc

Tahini: protein, thiamin, phosphorus, monounsaturated fats and some omega 3’s, copper, manganese

Kale Tahini Ceasear_Dressed.JPG

Balsamic Roasted Portobellos

Balsamic+Roasted+Mushrooms_EVOO.jpg

I am such a fan of portobello mushrooms. They add a meatiness to dishes, they bring out the flavor of other ingredients in dishes, and, I think, you can really add any flavors to them that you want to them. They are so easy to roast and they can be stored in the refrigerator to incorporate in dishes later throughout the week. You can stuff them, add them to pasta sauces, make them a burger if you don’t eat meat and so much more. The other day I decided that I needed something more for my kale caesar salad and pretty quickly these portobellos came to mind. I’m sharing this super simple recipe with you guys today so that you can throw these together for an easy side dish, salad topping, entree and more any night of the week!

Happy Fueling!

Taylor


Simple Balsamic Roasted Portobello Mushrooms

Makes 2 mushrooms

Balsamic+Roasted+Mushrooms.jpg

Ingredients:

  • 2 large portobello mushrooms

  • 1 1/2 teaspoons olive oil

  • 1 1/2 teaspoons balsamic vinegar

Directions

  1. Preheat the oven to 350 degrees F.

  2. Line a small baking sheet with foil or parchment paper.

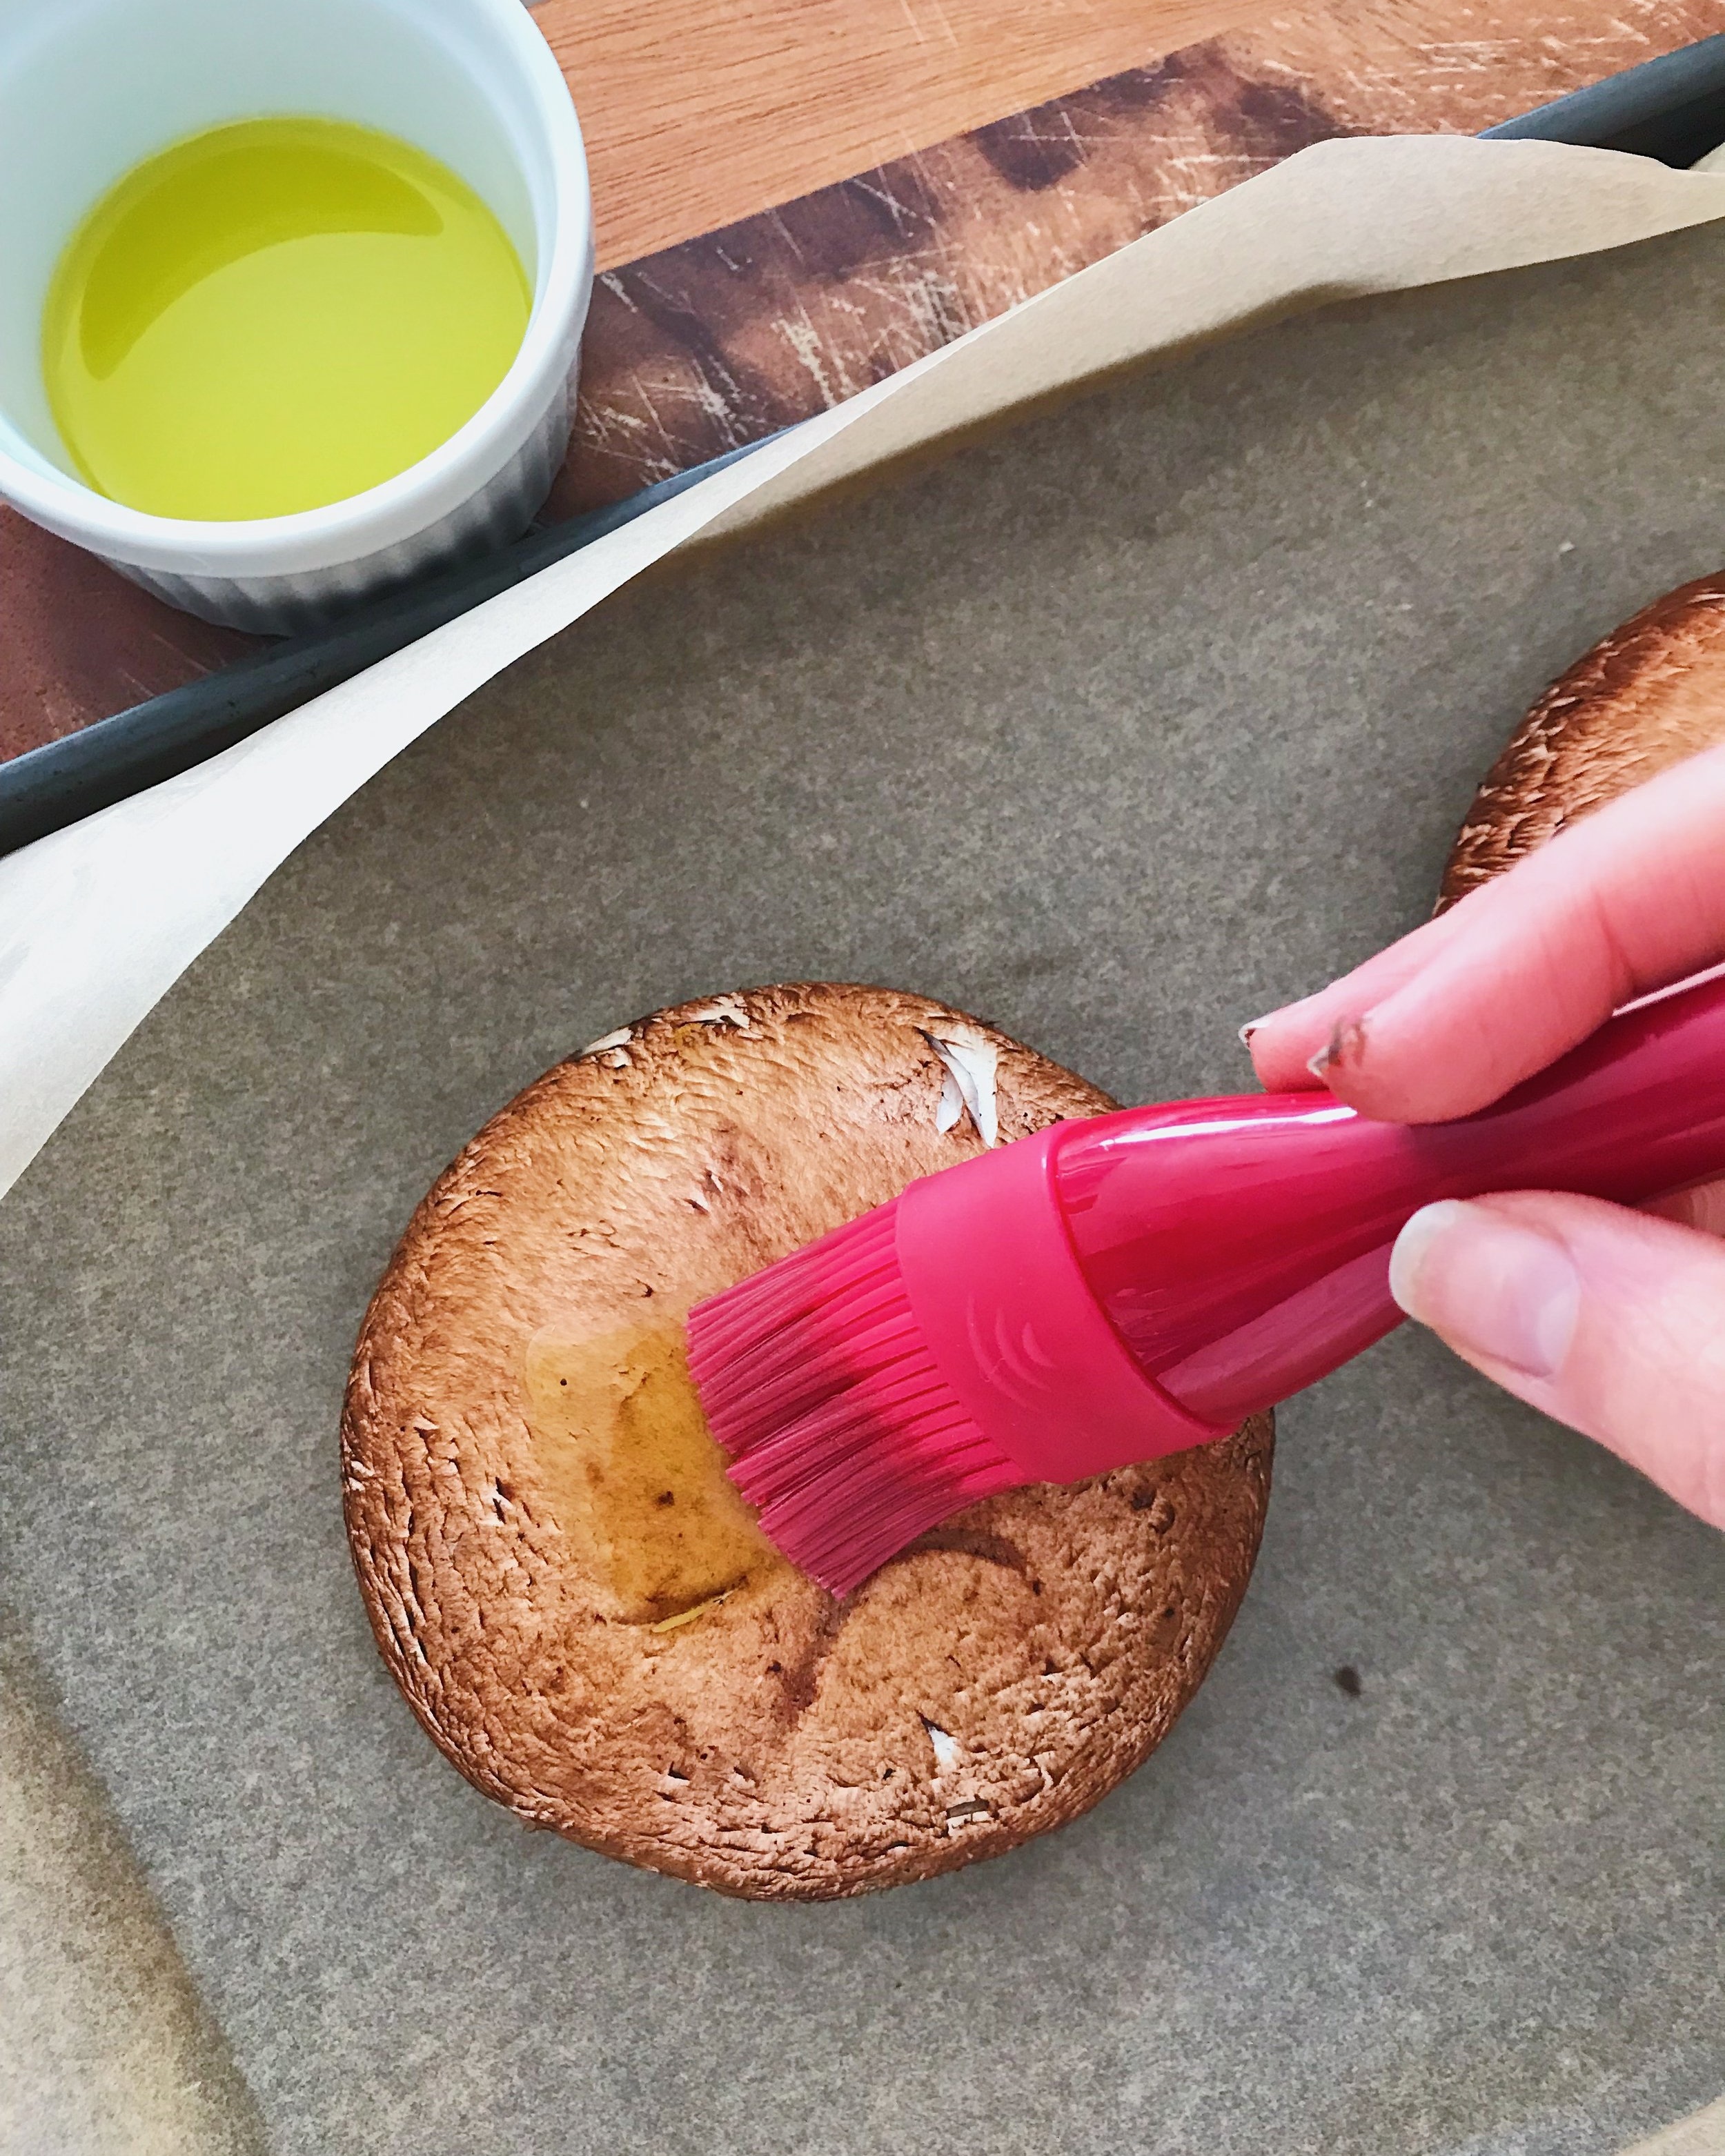
  3. Using a basting brush (I love my silicone one that we got as part of a wedding gift), lightly brush the olive oil on both sides of both mushrooms. You don’t have to use all of the olive oil.

  4. Using the same basting brush, brush the balsamic vinegar on both sides of the mushrooms. Use as much of the balsamic as you can. I try to make sure it gets in the ridges (or gills) of the underside of the mushroom.

  5. Now place the mushrooms gill-side-up on the lined baking sheet.

  6. Bake in the oven for about 15 to 20 minutes, until the mushrooms are tender.

  7. There will be liquid in the well of the mushroom. I just pour that out into the sink. If you are adding the to a pasta or other dish, add that liquid into what you are cooking for extra flavor!

  8. Leave the mushrooms whole or dice them to add to sides, salads, pastas and more.

  9. Enjoy!


NUTRITION NOTES:

Mushrooms are great for their meatiness and their ability to bring out the flavors of foods they are paired with. They are also packed with nutrients like niacin & riboflavin (B vitamins that help the body make energy), selenium, phosphorus, copper and potassium, which are all important nutrients in helping our body function properly.